In today’s connected homes, effective communication is key to keeping everyone on the same page. Whether you need to announce dinner, call the kids, or simply share a quick thought, shouting across the house is inefficient and often unheard. This is where Apple Intercom on your HomePod or HomePod mini steps in, transforming your smart speakers into a powerful, whole-home communication system. This comprehensive guide will walk you through everything you need to know, from initial setup to advanced usage, ensuring your family stays seamlessly connected.
Understanding Apple Intercom
Apple Intercom is a feature that allows you to send and receive voice messages between HomePod speakers, as well as with your other Apple devices like iPhone, iPad, Apple Watch, and even CarPlay. It turns your HomePod into a central communication hub, letting you broadcast messages to specific rooms or your entire household with a simple voice command or tap in the Home app. This functionality extends beyond just HomePods, integrating deeply with your existing Apple ecosystem.
What is Apple Intercom and How It Works?
Apple Intercom leverages Siri and the Home app to facilitate instant voice messages throughout your home. When you send an Intercom message, your recorded voice is transmitted to all designated HomePod speakers and other compatible Apple devices. The messages play automatically on HomePods, while other devices receive a notification and can play the message or reply. It’s like having a walkie-talkie system for your entire home, but with the intelligence and convenience of Siri. This feature is designed to simplify daily interactions and enhance the utility of your Smart Speakers.
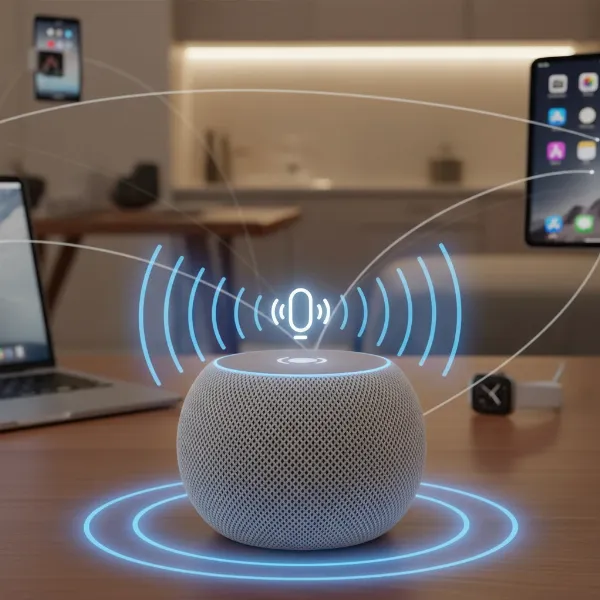 Apple HomePod smart speaker showing intercom feature for home communication
Compatibility and Software Requirements
To utilize Apple Intercom, your devices must meet specific software requirements. All your HomePod and HomePod mini speakers need to be updated to the latest software version. Similarly, any iPhone, iPad, or Apple Watch you wish to use for sending or receiving Intercom messages must be running iOS 14.2 or later, iPadOS 14.2 or later, and watchOS 7.1 or later, respectively. CarPlay also supports Intercom for on-the-go communication. Ensuring all your devices are up-to-date is the crucial first step, as Intercom typically activates automatically once the necessary software is installed.
Step-by-Step Setup Guide for HomePod Intercom
Setting up Intercom on your Apple HomePod is a straightforward process, largely managed through the Home app on your iPhone or iPad. Once configured, you’ll enjoy instant communication across your connected devices.
Accessing Intercom Settings in the Home App
Before diving into preferences, ensure all your Apple devices and HomePods are running the required software versions. Once updated, Intercom is often automatically enabled. To access and customize its settings:
- Open the Home App: Launch the Home app on your iPhone or iPad.
- Navigate to Home Settings: Tap the More button (often represented by three dots or a house icon, depending on your iOS version) usually found in the top-left corner. Then, select Home Settings.
- Select Intercom: Scroll down and tap on Intercom from the list of options.
This section provides a central hub for all your Intercom configurations, allowing you to tailor the feature to your family’s specific needs and preferences.
Configuring Intercom Preferences
Within the Intercom settings, you have granular control over how messages are handled, who can use the feature, and on which devices.
- Notification Settings: You can choose when your personal device receives Intercom notifications:
- Never: Turns off all Intercom notifications for your device.
- When I’m Home: You’ll only receive notifications when your device detects it’s within your home network.
- Anywhere: You’ll receive Intercom notifications regardless of your location, even when you’re away from home.
- Note: For the “When I’m Home” setting to function correctly, Location Services must be enabled for your device in the Settings app under Privacy & Security.
- Managing Access for Home Members: Here, you can select which members of your Home have permission to send and receive Intercom messages on their Apple devices. This is useful for controlling who can participate in the household communication.
- Selecting HomePod Speakers for Intercom: You can also choose which specific HomePod speakers in your home will send and receive Intercom messages. This allows you to exclude certain speakers, perhaps in a nursery or office, from receiving broadcasts if desired.
By carefully adjusting these settings, you can ensure Intercom operates exactly as you intend, providing convenience without unnecessary interruptions.
How to Use Apple Intercom on Your HomePod and Devices
Once Intercom is set up, sending and receiving messages is incredibly intuitive, primarily through Siri or the Home app.
Sending Messages with Siri
Siri makes sending Intercom messages hands-free and efficient. You can use simple voice commands on your HomePod, iPhone, iPad, Apple Watch, AirPods, or CarPlay.
- General Broadcasts: To send a message to all HomePod speakers and compatible devices in your home, use phrases like:
- “Hey Siri, intercom ‘Dinner is ready!'”
- “Hey Siri, tell everyone ‘I’m heading out.'”
- “Hey Siri, announce ‘The movie is starting in five minutes.'”
- Room-Specific Messages: For more targeted communication, address specific rooms or zones:
- “Hey Siri, ask the kitchen ‘What’s for breakfast?'”
- “Hey Siri, announce upstairs ‘Time to get ready for school.'”
- “Hey Siri, tell the living room ‘Please turn off the lights.'”
Siri’s natural language processing makes these commands easy to remember and execute, streamlining communication within your smart home.
Sending Messages with the Home App
For those times when speaking aloud isn’t ideal, or if you prefer a visual interface, the Home app offers a simple way to send Intercom messages:
- Open the Home App: Launch the Home app on your iPhone or iPad.
- Tap the Intercom Button: Look for the Intercom button (often an audio wavelength icon) in the top-right corner of the screen.
- Record Your Message: A recording interface will appear. Speak your message clearly.
- Send the Message: Once you’ve finished speaking, tap the Done button (usually orange).
This method sends your message to all HomePods and other enabled devices, just like a Siri command.
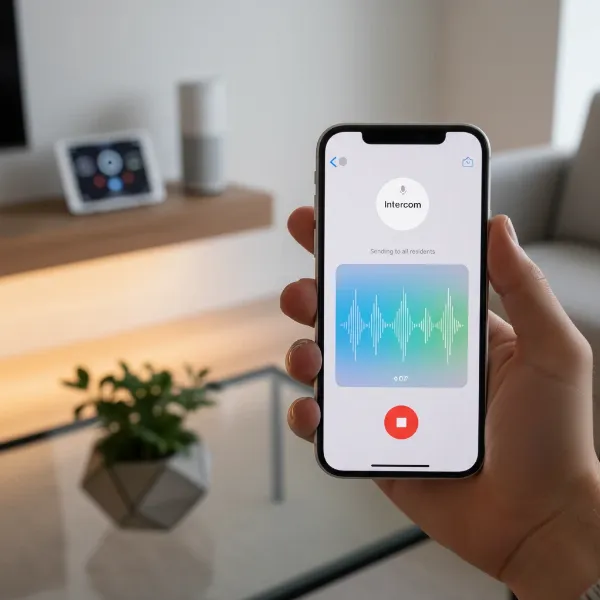 iPhone screen displaying Apple Home app with intercom message recording interface
Using with Other Devices
Apple Intercom isn’t limited to just HomePod and your core Apple devices. You can also send and receive messages using your AirPods or compatible Beats headphones when connected to your iPhone, iPad, or Apple Watch. This allows for private, on-the-go communication with your home. Additionally, CarPlay integration means you can communicate with your home while driving, making it easy to announce your arrival or check in with family members.
Replying to Intercom Messages
Receiving an Intercom message isn’t just a one-way street; you can easily reply to keep the conversation flowing.
After a message plays on your HomePod or device, you can respond using Siri.
- General Replies: If the original message was a whole-home broadcast, your reply will also go to all HomePods and enabled devices:
- “Hey Siri, reply ‘I’ll be right there.'”
- “Hey Siri, reply ‘I fed the dog this morning.'”
- Targeted Replies: If the message was sent to a specific room, your reply will automatically go back only to the HomePod or device that initiated that specific message. You can also explicitly name the destination in your reply if you wish to target a different room or sender:
- “Hey Siri, reply to the living room ‘Which movie are you watching?'”
- “Hey Siri, reply downstairs ‘I’ll be there in 5 minutes.'”
“Intercom transforms your HomePods into a central nervous system for your home, bridging communication gaps instantly and effortlessly.” – Alex Chen, Smart Home Integration Specialist
Important Note on Voice Recognition
If you have voice recognition set up on your HomePod, Intercom messages that you send using that HomePod will not be received by your personal iPhone, iPad, or Apple Watch. This is designed to prevent you from receiving your own message on multiple devices when you’re already interacting with the HomePod.
Advanced Tips and Troubleshooting
While Apple Intercom is designed for simplicity, a few advanced tips and troubleshooting steps can enhance your experience or resolve common issues.
Turning Off Intercom for Specific Devices or Members
You have the flexibility to disable Intercom for certain devices or individuals within your home.
- Go to the Home app on your iPhone or iPad.
- Tap the More button, then Home Settings.
- Tap Intercom.
- Under the “HomePod” section, you can toggle off specific HomePods or accessories.
- Under the “People” section, you can turn off Intercom for individual members of your home, preventing them from sending or receiving messages on their personal devices.
This allows for greater privacy and control over who participates in Intercom communication.
Ensuring All Devices Are Updated
Many Intercom issues stem from outdated software. Always verify that your HomePod speakers, iPhone, iPad, and Apple Watch are running the latest compatible iOS, iPadOS, watchOS, and HomePod software versions. Regular updates not only enable new features but also resolve bugs that might affect Intercom functionality.
Checking Wi-Fi Connectivity
HomePods and other Apple devices rely on a stable Wi-Fi connection for Intercom to work. Ensure all your devices are connected to the same home Wi-Fi network and that the signal is strong. Weak or intermittent Wi-Fi can cause delays or failures in sending and receiving Intercom messages. Restarting your router or HomePods can sometimes resolve minor connectivity glitches.
Siri Recognition Issues
If Siri struggles to understand your Intercom commands, try speaking clearly and enunciating your words. Ensure there isn’t excessive background noise competing with your voice. You can also adjust Siri’s listening sensitivity in the HomePod settings within the Home app if it frequently misinterprets commands.
Conclusion
Apple Intercom on your HomePod fundamentally changes how families communicate within a smart home. From quick announcements to multi-room conversations, it offers a seamless, hands-free solution that integrates effortlessly with your existing Apple ecosystem. By following these setup and usage guidelines, you can transform your HomePods from mere audio devices into an indispensable tool for household coordination. Embrace the power of instant connection and make shouting a thing of the past. Are you ready to streamline your home’s communication with Apple Intercom?
Frequently Asked Questions
What devices are compatible with HomePod Intercom?
Apple Intercom is compatible with HomePod, HomePod mini, iPhone (iOS 14.2 or later), iPad (iPadOS 14.2 or later), Apple Watch (watchOS 7.1 or later), AirPods, compatible Beats headphones, and CarPlay. Ensure all devices are running the latest software for optimal functionality.
How do I turn off Intercom notifications?
You can manage Intercom notifications in the Home app. Go to Home Settings, then tap Intercom. Here, you can choose to receive notifications “Never,” “When I’m Home,” or “Anywhere” for your personal device, or disable Intercom for specific HomePods or household members.
Can I send an Intercom message to just one room?
Yes, you can send targeted Intercom messages. When using Siri, specify the room in your command, for example, “Hey Siri, tell the kitchen ‘Dinner is ready!'” This will send the message only to the HomePod speakers located in that designated room.
What software version does my HomePod need for Intercom?
Your HomePod or HomePod mini must be updated to the latest available software version to use Intercom. Additionally, your iPhone needs iOS 14.2+, iPad needs iPadOS 14.2+, and Apple Watch needs watchOS 7.1+ for full feature compatibility.
Why isn’t my HomePod Intercom working?
Common reasons for Intercom issues include outdated software on your devices or HomePods, poor Wi-Fi connectivity, or incorrect settings within the Home app. Ensure all devices are updated, connected to the same stable Wi-Fi network, and check your Intercom preferences in Home Settings.